I know what you're thinking. I'll just go ahead and say it: These are incredibly silly.
Although you have to admit, adorably silly. Fun, awesome, delicious silly. I'm-pretty-sure-you're-a-child silly. It's cool. I feel you, and I agree.
It's just that I really like to make silly things sometimes. And I kind of have a thing for homemade versions of pre-packaged goods.
Actually, a few weeks ago I made desserts for a party at a children's bookstore. There were mini rice crispy squares, two kinds of bite-size brownies (sprinkles and caramel), two kinds of tiny whoopie pies (chocolate and lemon), and two kinds of fruit hand pies (blueberry and apple). There were copycat Hostess cupcakes (you know the ones--cream filling, cute squiggly on top). And Twinkies! Of all the desserts I made (300 in total), I was, for some reason, most concerned about the Twinkies.
They're such an iconic sweet snack, I really wanted to get them right. So I made homemade marshmallow fluff to make the marshmallow filling and a light spongy yellow cake.

And I must say, they were pretty much Twinkie perfection.
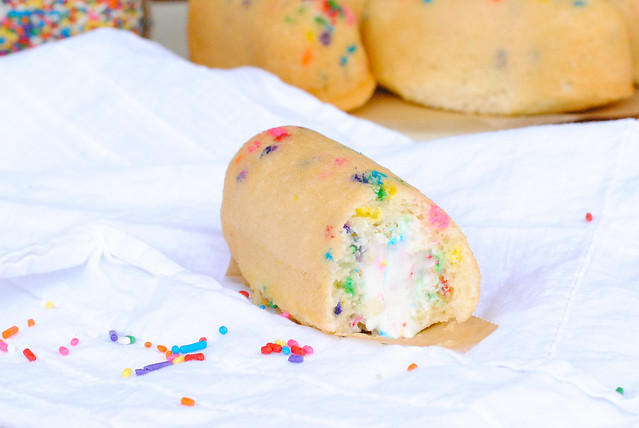
The cake came out fluffy and moist and pleasantly yellow. The filling creamy and perfectly sweet (perhaps slightly less fluffy, and definitely less greasy, than the real thing). A homemade junk food dream! Well, almost...

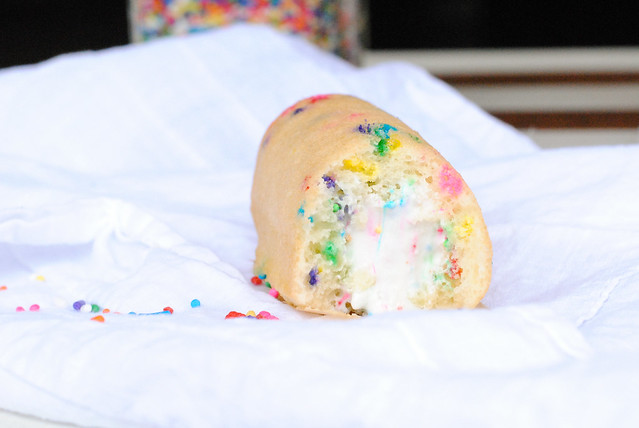
After this clever guy I know posed the idea to me of combining my Twinkie success with a nostalgic boxed sweet, I decided that real junk food dreams require sprinkles.
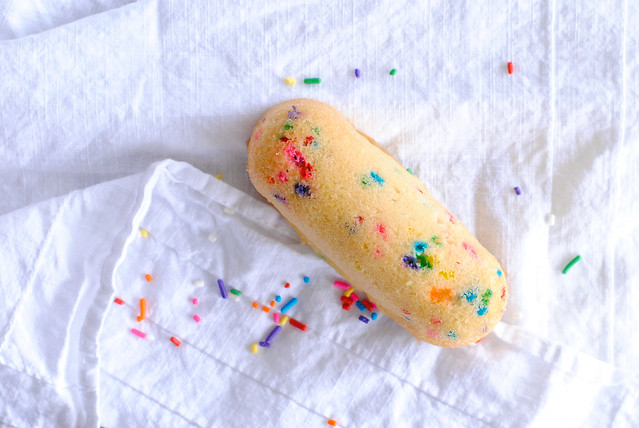
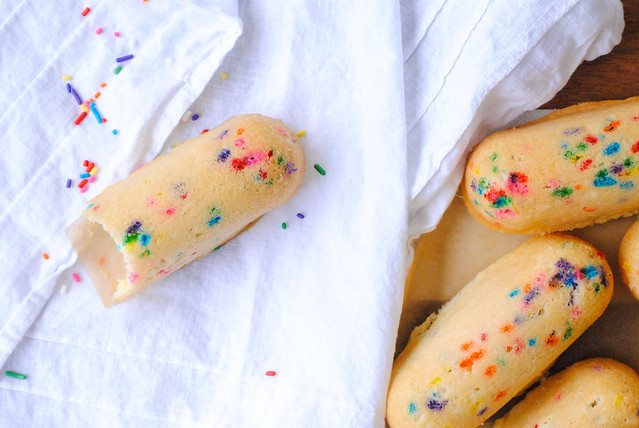
Sponge cake, sprinkles, marshmallow cream, more sprinkles, and, naturally, happiness. Sounds like a dream to me. I'm in!
Funfetti Twinkies
makes 18-22 oblong cakes
base cake recipe adapted from King Arthur Flour
Note: This recipe uses a cream canoe pan but can easily be turned into cupcakes. You just need to increase the baking time. For regular Twinkies, eliminate the sprinkles from the cake and the filling.
240g (2 cups) cake flour
300g (1 1/2 cups) granulated sugar
1 Tbsp. baking powder
1 tsp. salt
1/2 cup vegetable oil
3/4 cup cold water
1 tsp. vanilla extract
1/4 tsp. butter flavoring
7 eggs, separated
1/2 cup rainbow jimmies
Marshmallow Cream Filling (recipe below)
Preheat oven to 350 degrees F. Grease and flour a cream canoe pan and set aside.
In the bowl of a stand mixer fitted with the paddle attachment, mix flour, sugar, baking powder, and salt on low (2 on a KitchenAid) speed until combined. In a medium bowl, lightly mix oil, water, vanilla, butter flavoring, and egg yolks (the mixture will not completely come together, that's ok). With the mixer on low, add wet ingredients to the dry ingredients and mix until smooth.
In a separate bowl, whip egg whites until stiff. Fold the whites into the batter in thirds until no streaks remain. Add the jimmies to the batter along with the last third of whites, folding in the same manner. Do not over-mix.
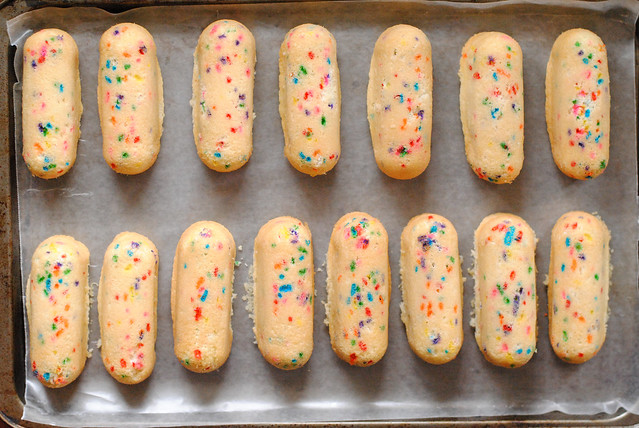
Using a pyrex glass measuring cup or bowl with a lip, slowly pour the batter into each well of the prepared pan until 2/3 full. (Unless you have multiple cream canoe pans, you will be baking these in batches. Be sure to give the batter a light mix in between batches to redistribute sprinkles that have sunk to the bottom.) Bake for 10-12 minutes, until tester comes out clean and cakes spring back when touched.
Let cool in the pan for 5 minutes then quickly invert the pan over a cooling rack. The cakes should easily come out of the pan. If they don't, tap the edge of the pan lightly on the cooling rack. Let cakes cool completely before filling.
Once cakes have cooled, use a skewer to make three evenly spaced holes in the bottom of the cakes, gently swirling the skewer around inside the cake to make a little room for the filling. (I have made these without making the holes, and it works fine. You just won't get quite as much filling in the cake.) Place filling in a pastry bag fitted with a small round tip. Squeeze filling into each hole in the cake until you feel the cake expand just slightly.
Cakes will keep in an airtight container for a few days. I individually wrapped mine in plastic wrap.
For Marshmallow Cream Filling
Note: After mixing up the first batch of this filling, I increased the amount of fluff and sugar to make it a bit sweeter. My measurements below include these adjustments as closely as I could approximate. Feel free to adjust as necessary.
2 1/4 cups Marshmallow Fluff (recipe below, or you can use jarred)
85 g (6 Tbsp.) butter, at room temperature
80 g (2/3 cup) powdered sugar
large pinch salt
1 tsp. vanilla extract
1/3 cup rainbow nonpareils
Place fluff and butter in the bowl of a stand mixer fitted with the whisk attachment and beat on medium-high speed (6 on a KitchenAid) for about a minute. Reduce speed to low (2 on a KitchenAid) and add the sugar and salt. Increase speed again to medium-high and beat until light and creamy, about 2 minutes. Add vanilla and beat one minute more. Fold in nonpareils until evenly distributed. Use immediately.
If the filling is a bit too soft after being whipped up, stick it in the fridge for 10 or so minutes before transferring it to the pastry bag.
For Marshmallow Fluff
makes about 3 cups
adapted from Annie's Eats
150 g (3/4 cup) granulated sugar
1/2 cup light corn syrup
1/4 cup water
pinch salt
2 egg whites, at room temperature
1/4 tsp. cream of tartar
1 1/2 tsp. vanilla bean paste or 1/2 vanilla bean, scraped
Place sugar, corn syrup, water, and salt in a small saucepan and whisk to combine. Place pan over medium-high heat and cook, stirring occasionally, until the mixture reaches 240 degrees F.
While the sugar syrup is heating, place egg whites and cream of tartar in the bowl of a stand mixer fitted with the whisk attachment. When the syrup is getting close to 240, turn the mixer to medium-high speed (6 on a KitchenAid) and whip the egg whites to soft peaks. Turn mixer off until syrup is ready.
As soon as the sugar syrup reaches 240, remove from the heat. With the mixer on low (2 on a KitchenAid), slowly pour the syrup down the inside of the mixing bowl. Once all of the syrup has been added, increase the mixer speed to medium-high and whip until the mixture forms stiff, shiny peaks and the outside of the mixing bowl feels neutral in temperature, 5-8 minutes. Mix in the vanilla bean paste or seeds until incorporated. Marshmallow fluff will keep stored in an airtight container in the refrigerator for a little over a week.

OH MY GOSH. You, sweet dear, are amazing.
ReplyDeleteWhat do you think about making some homemade swiss cake rolls? Devil's food, marshmallow filling, and ganache?
xo
Swiss cake rolls were my favorite little debbie confection in elementary school, so I am obviously totally down for making some! Although rolling cake does scare me a little...
Deleterolling a cake is actually very easy, so don't sweat it! your first few cakes will just come out sloppy. the rest will be fine.
DeleteWhat an incredibly silly and awesome idea ;) I love this!!!
ReplyDeleteThanks, I just can't help but love the silly sometimes!
Deletehomemade twinkies! without all the crap! this is fabulous. I'm from Spain and I swear I've never tried a twinkie because once upon a time I saw an episode of 'how it's made' and the twinkie making process was too gross. this is awesome.
ReplyDeleteHaha, now you can experience Twinkie greatness crap-free!!
DeleteWhoa! I never would have thought of making HOMEMADE twinkies. That's such a neat idea! I'm adding it to "the list" :)
ReplyDeleteAwesome, let me know how they turn out!
DeleteTotal awesomeness!
ReplyDeleteAdorable and colorful twinkies! My husband loves twinkies! Homemade sounds even better!
ReplyDeleteI must admit, they are pretty friggin' amazing.
DeleteSo Cute! I MUST Try!
ReplyDeleteI just found the perfect birthday treat to make for my friend's 40th this week! Thanks!
ReplyDeleteFunfetti Twinkies.. Seriously!!!.. you are my new best friend..
ReplyDelete